MR3-UI
MR3-UI is a module for checking the state of DAGAppMaster, visualizing the progress of DAGs, and analyzing statistics of DAG executions. Internally MR3 DAGAppMaster runs both an HTTP server and a Timeline Server, and the user can connect to it from the web browser.
Configuring MR3-UI
The following configuration keys should be set to true in mr3-site.xml
in order to create the HTTP server and send data to the Timeline Server for MR3-UI.
vi mr3-site.xml

<property>
  <name>mr3.app.history.logging.enabled</name>
  <value>true</value>
</property>

<property>
  <name>mr3.dag.history.logging.enabled</name>
  <value>true</value>
</property>

<property>
  <name>mr3.ui.create.server</name>
  <value>true</value>
</property>
Using MR3-UI
The HTTP server for MR3-UI runs inside MR3 DAGAppMaster
and can be reached using the same address
with a port specified by the configuration key mr3.ui.server.port in mr3-site.xml.
vi mr3-site.xml

<property>
  <name>mr3.ui.server.port</name>
  <value>19003</value>
</property>
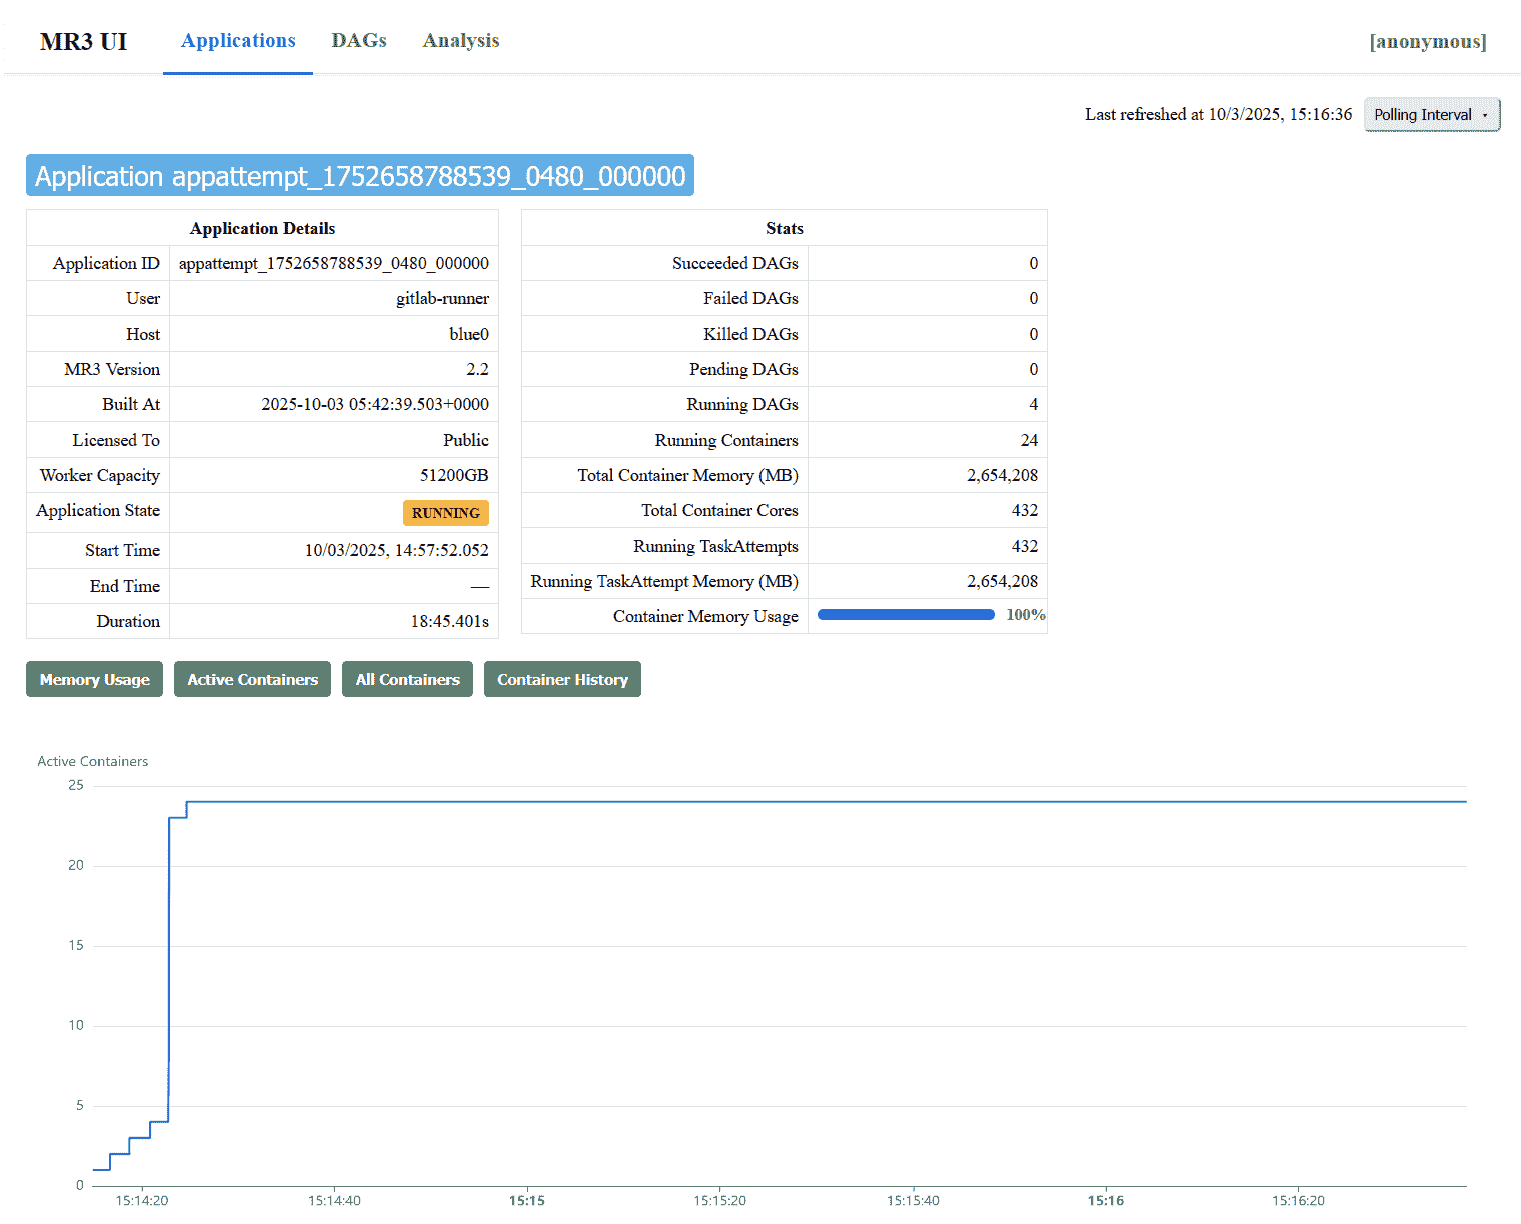
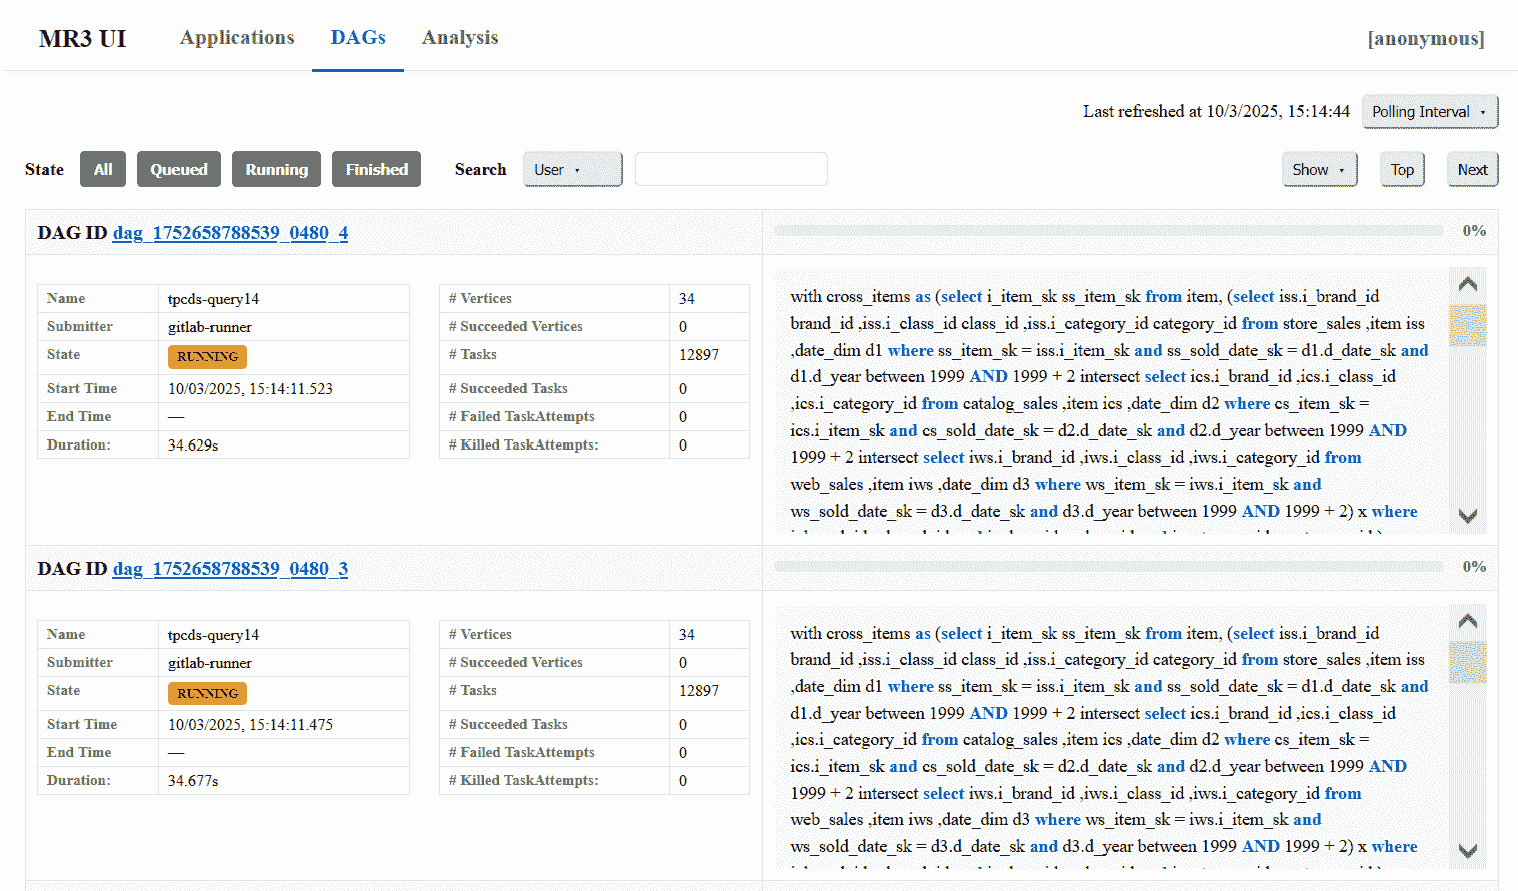
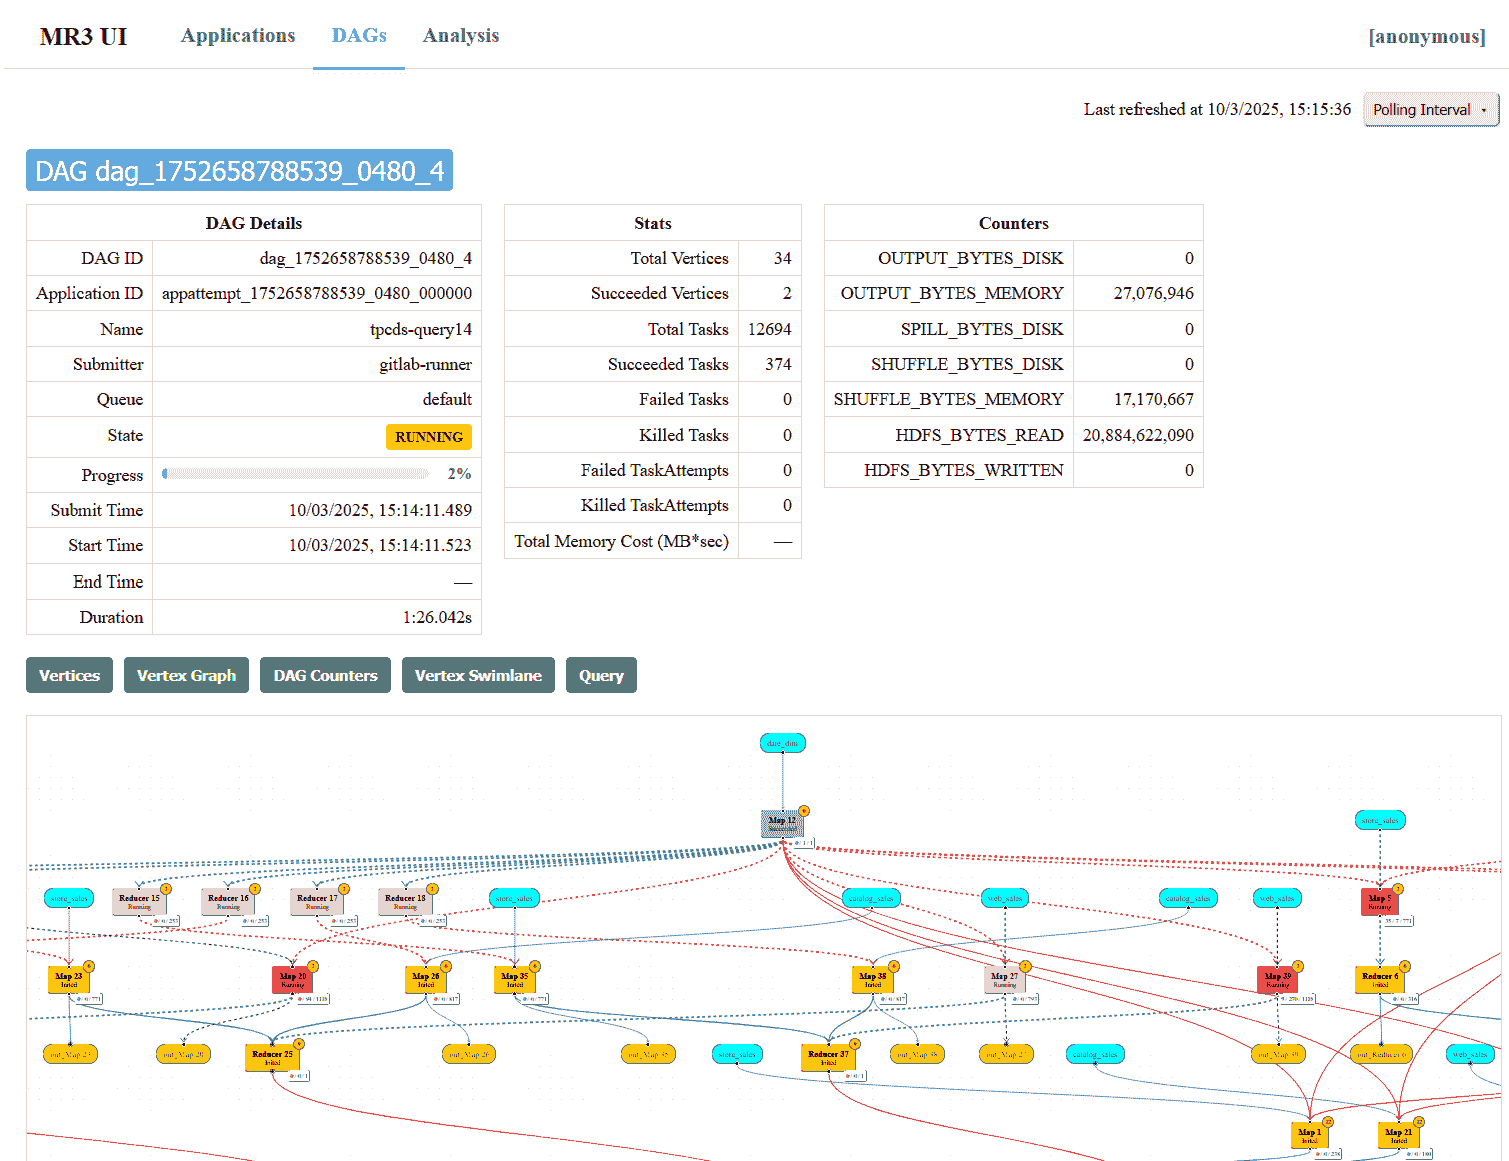
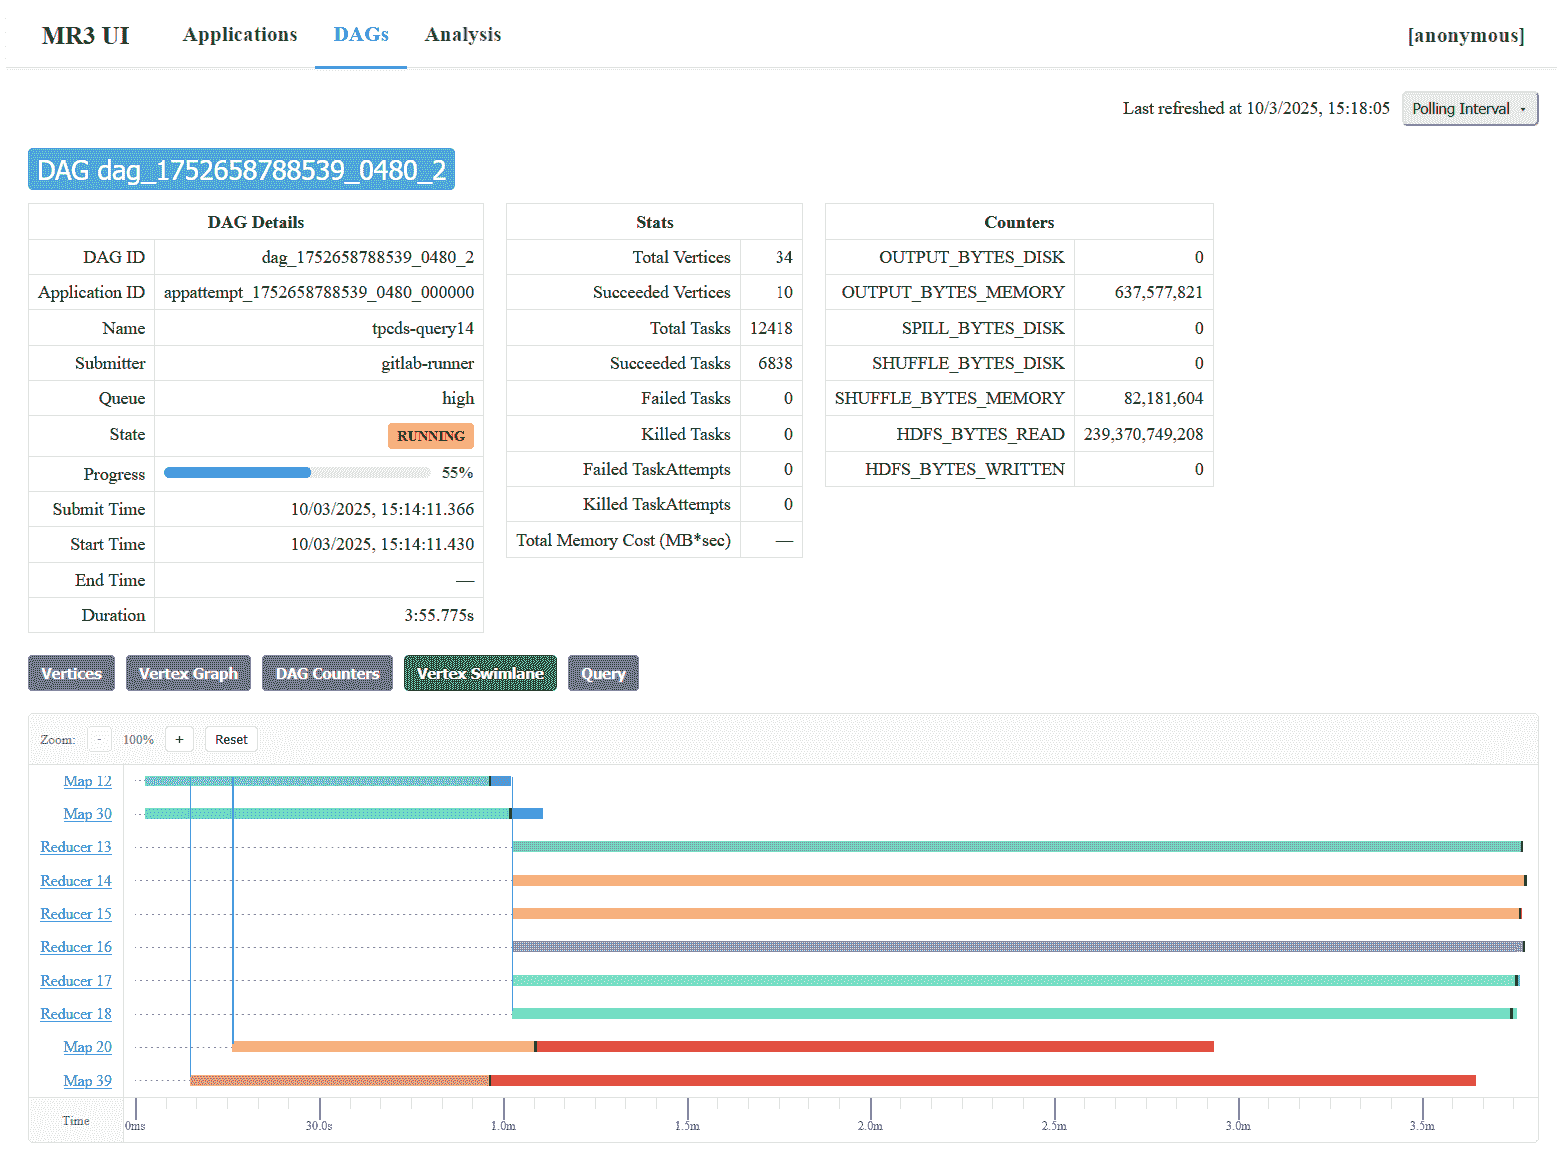
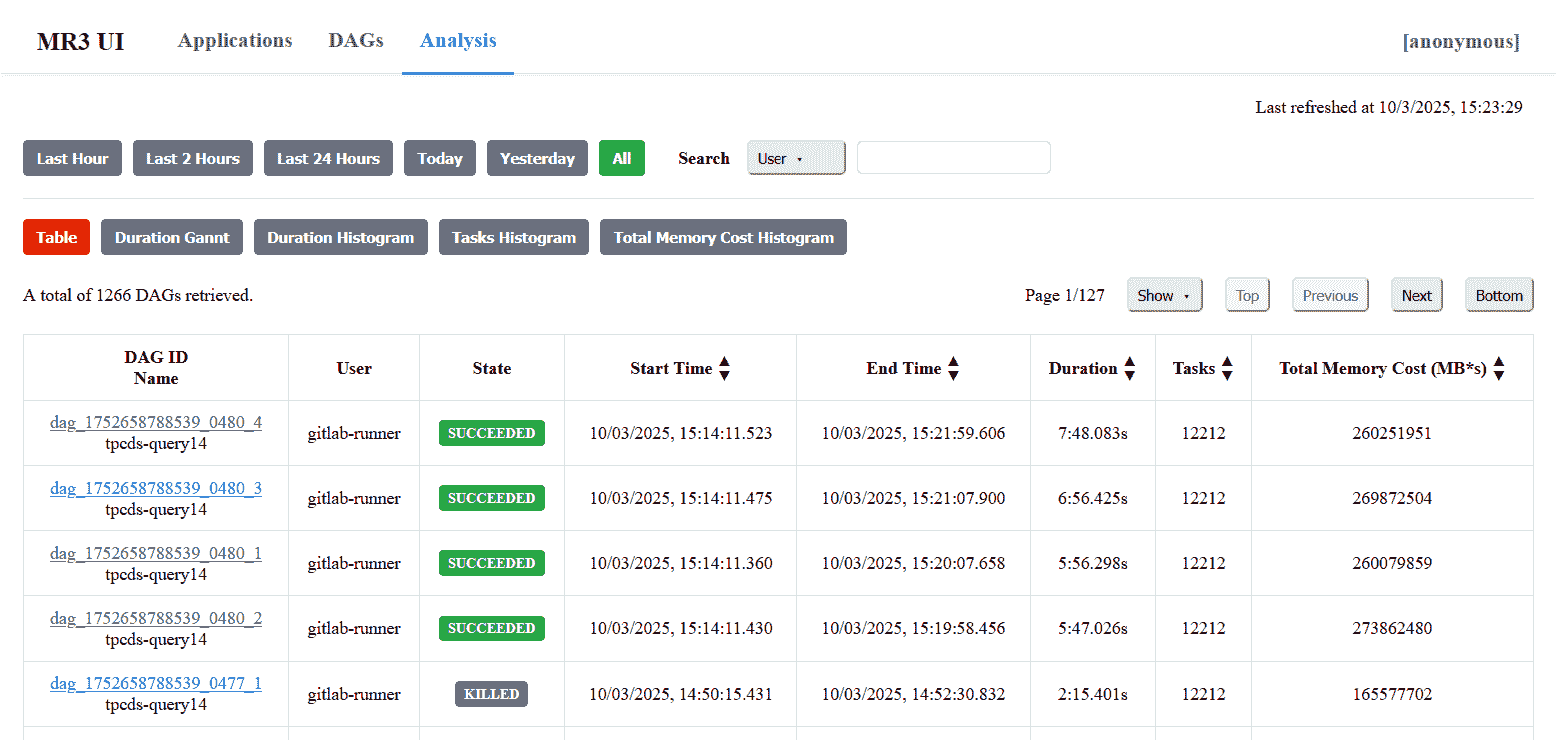
MR3-UI has three main tabs at the top: Applications, DAGs, and Analysis.
- The
Applicationstab lists MR3 Applications, both currently active and previously finished, in reverse chronological order.


- The
DAGstab lists DAGs, both currently active and previously finished, of the currently active MR3 Application.
- The
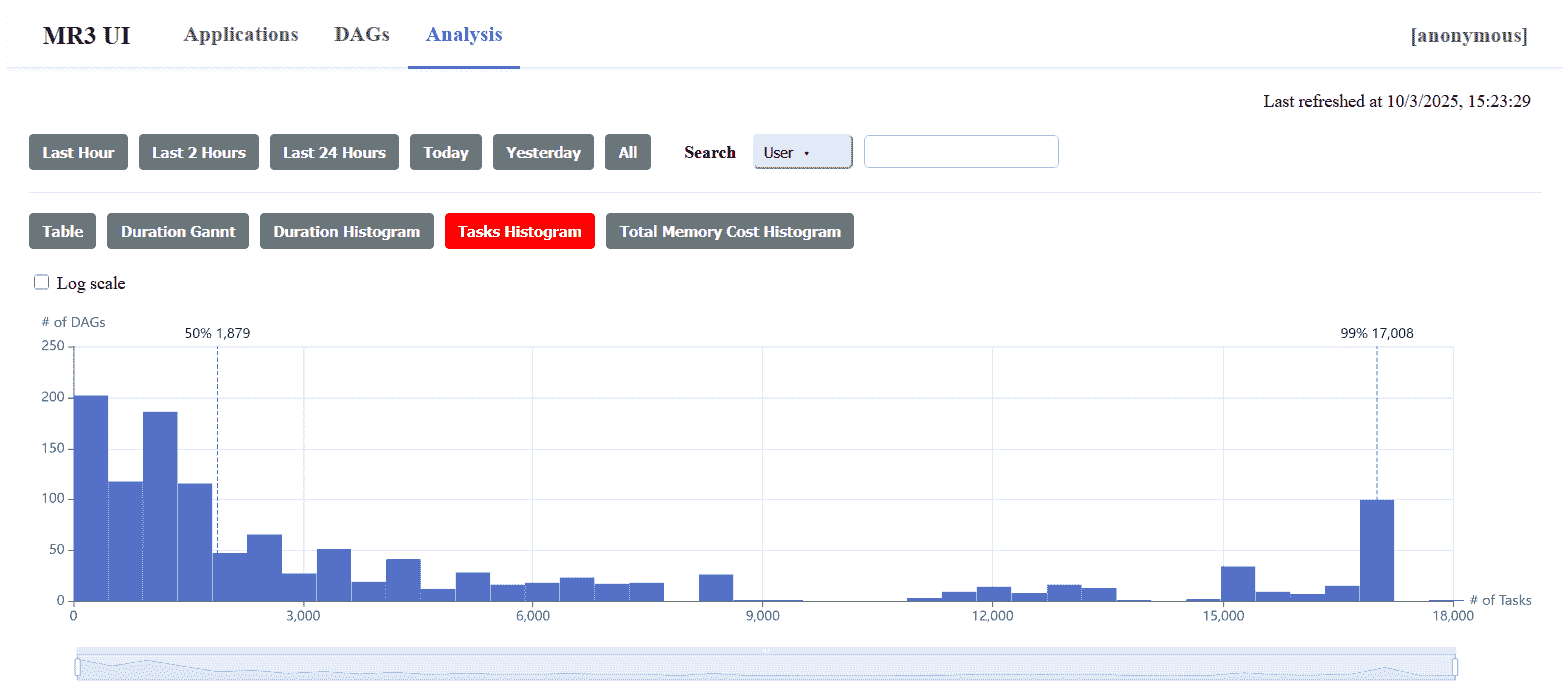
Analysistab shows statistics of all previous DAG executions.
Connecting to MR3-UI with Kerberos
If the HTTP server is configured with Kerberos authentication, the following two requirements should be met:
- The user can obtain a valid Kerberos ticket from the KDC server.
- The web browser is configured to establish a secure connection with the HTTP Server.
A failure to meet these requirements usually results in an error message shown below:

Obtaining a Kerberos ticket
In order to obtain a Kerberos ticket, the user should install a Kerberos client on the local machine and configure it.
For example, the user can set the configuration file /etc/krb5.conf on Linux or C:\ProgramData\MIT\Kerberos5\krb5.ini on Windows.
In the following example, we communicate with the KDC server at red0 through local port 5001.
vi /etc/krb5.conf

[libdefaults]
  renew_lifetime = 7d
  forwardable = true
  default_realm = RED
  ticket_lifetime = 24h
  dns_lookup_realm = false
  dns_lookup_kdc = false
  default_ccache_name = /tmp/krb5cc_%{uid}

[logging]
  default = FILE:/var/log/krb5kdc.log
  admin_server = FILE:/var/log/kadmind.log
  kdc = FILE:/var/log/krb5kdc.log

[realms]
  RED = {
    admin_server = red0
    kdc = localhost:5001
  }
Next the user should establish a connection to the KDC server so as to obtain a Kerberos ticket.
In the following example, the user connects to the KDC server on red0:88 through local port 5001 via a remote server master1 (where red0 is directly accessible).
ssh -L5001:red0:88 gla@master1
Then the user can obtain a valid Kerberos ticket, e.g., by executing kinit.
Configuring the web browser
With a valid Kerberos ticket, the user should configure the web browser so that it can establish a secure connection.
As an example, we use local port 5000 through which the web browser communicates with DAGAppMaster running at red0 via a remote server master1 (on which red0 is directly accessible):
ssh -D5000 gla@master1
In Firefox, the user should enable manual proxy configuration with port 5000:
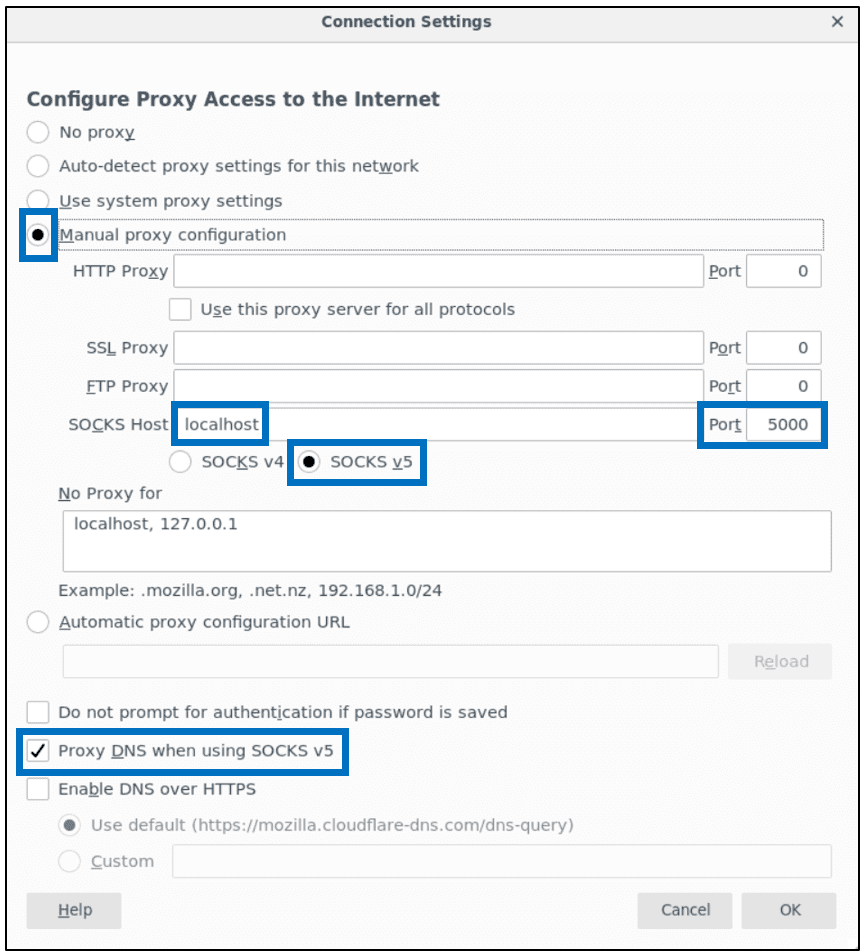
Then the following two configuration keys should be set to the host running DAGAppMaster (in Firefox):
network.negotiate-auth.delegation-urisnetwork.negotiate-auth.trusted-uris
On Windows, another configuration key network.auth.use-sspi should be set to false.
Now MR3-UI should run okay.